

- Call from code: Invoke your agent remotely via the LangGraph SDK or REST API, without downloading anything.
- Export to code: Download your agent’s configuration and run it locally as a self-contained Python project using the
fleet-deepagents-exportpackage.
Call from code
You can invoke LangSmith Fleet agents from your applications using the LangGraph SDK or the REST API. Fleet agents run on Agent Server, so you can use the same API methods as any other LangSmith deployment. The REST API lets you call your agent from any language or platform that supports HTTP requests.Prerequisites
- A LangSmith account with a Fleet agent
- A Personal Access Token (PAT) for authentication
- (SDK only) The LangGraph SDK installed:
Authentication
To authenticate with your agent’s Fleet deployment, provide a LangSmith Personal Access Token (PAT) to theapi_key argument when instantiating the LangGraph SDK client, or via the X-API-Key header. If using X-API-Key, you must also set the X-Auth-Scheme header to langsmith-api-key.
If the PAT you pass is not tied to the owner of the agent, your request will be rejected with a 404 Not Found error.
If the agent you’re trying to invoke is a and you’re not the owner, you can perform all the same operations as you would in the UI (read-only).
1. Get the agent ID and URL
To get your agent’sagent_id and api_url:
- In the LangSmith UI, open your agent.
- In the sidebar, expand the Advanced settings drawer.
- Under Developer, click View code snippets to see pre-populated values for your agent.
agent_id and api_url with the values from your agent’s code snippets.
Create a .env file in your project root with your Personal Access Token:
.env
2. Fetch agent configuration
Verify your connection by fetching your agent’s configuration:- Python
- TypeScript
- cURL
Use a Personal Access Token (PAT) tied to your LangSmith account. Set the
X-Auth-Scheme header to langsmith-api-key for authentication.3. Invoke agent
The examples below show how to send a message to your agent and receive a response. You can use either a stateless run (no thread, no conversation history) or a stateful run (with a thread to maintain conversation history across multiple turns).Stateless run
A stateless run sends a single request and returns the full response. No conversation history is persisted. This is the simplest way to call your agent:- Python
- TypeScript
- cURL
Stateless streaming run
To stream the response as it is generated rather than waiting for the full result, use the streaming endpoint:- Python
- TypeScript
- cURL
Stateful run with a thread
To maintain conversation history across multiple interactions, first create a thread and then run your agent on it. Each subsequent run on the same thread has access to the full message history:- Python
- TypeScript
- cURL
REST API reference
The table below summarizes the key endpoints. Replace<API_URL> with your agent’s deployment URL.
All endpoints require the following headers:
Content-Type: application/jsonX-Api-Key:your Personal Access TokenX-Auth-Scheme: langsmith-api-key
Forward caller headers to MCP servers
Header forwarding passes headers from a run request to your agent’s custom MCP servers on each tool call. Use it to give an MCP server per-run context, such as the end user’s ID or a downstream token.Header forwarding is available on self-hosted LangSmith only. An administrator must enable it first.
https://<your-langsmith-host>/api/v1/fleet. If you set config.basePath, use https://<your-langsmith-host>/<basePath>/api/v1/fleet.
To forward headers, prefix each one with X-Fleet-Forward- and send it on a request that starts a run:
X-Tenant-Id to the ID of the workspace that contains the agent.
Your MCP server receives each header with the prefix in place. Read X-Fleet-Forward-User-Id, not X-User-Id.
The following Fleet API endpoints forward headers. Replace <FLEET_API_URL> with your Fleet API base URL.
Forwarded headers follow these rules:
- Destination: Fleet forwards headers to custom MCP servers only, never to the built-in tool server.
- Header names: Matching is case-insensitive. Fleet normalizes names, so
x-fleet-forward-user-idarrives asX-Fleet-Forward-User-Id. - Conflicts: When a custom MCP server already configures a header with the same name, the configured value wins.
- Limits: A request with more than 10 forwarded headers returns
400. So does a name suffix afterX-Fleet-Forward-that is not 1 to 40 characters ofA-Z,a-z,0-9, or-. So does a header sent more than once, or a value that is not printable ASCII or exceeds 1,024 bytes.
Export to code
The Export to code feature lets you download your Fleet agent as a self-contained Python project and run it locally. This is useful when you want to:- Run your agent in your own infrastructure without calling the Fleet API
- Extend or customize the agent beyond what the Fleet UI supports (add custom tools, middleware, or skills)
- Inspect or version-control the full agent implementation
- Use LangGraph Studio for local development and graph inspection
fleet-deepagents-export package (GitHub) handles reading the exported configuration and wiring up your agent with MCP tools, subagents, and skills.
Prerequisites
- Python 3.11+
uv(recommended) for dependency management- A LangSmith Fleet agent to export
1. Copy the starter project
The starter project atexamples/template-agent/ is the recommended starting point. Clone the repo and copy the starter:
2. Export your agent from Fleet
In the LangSmith UI, open your agent and export it as a.zip file.
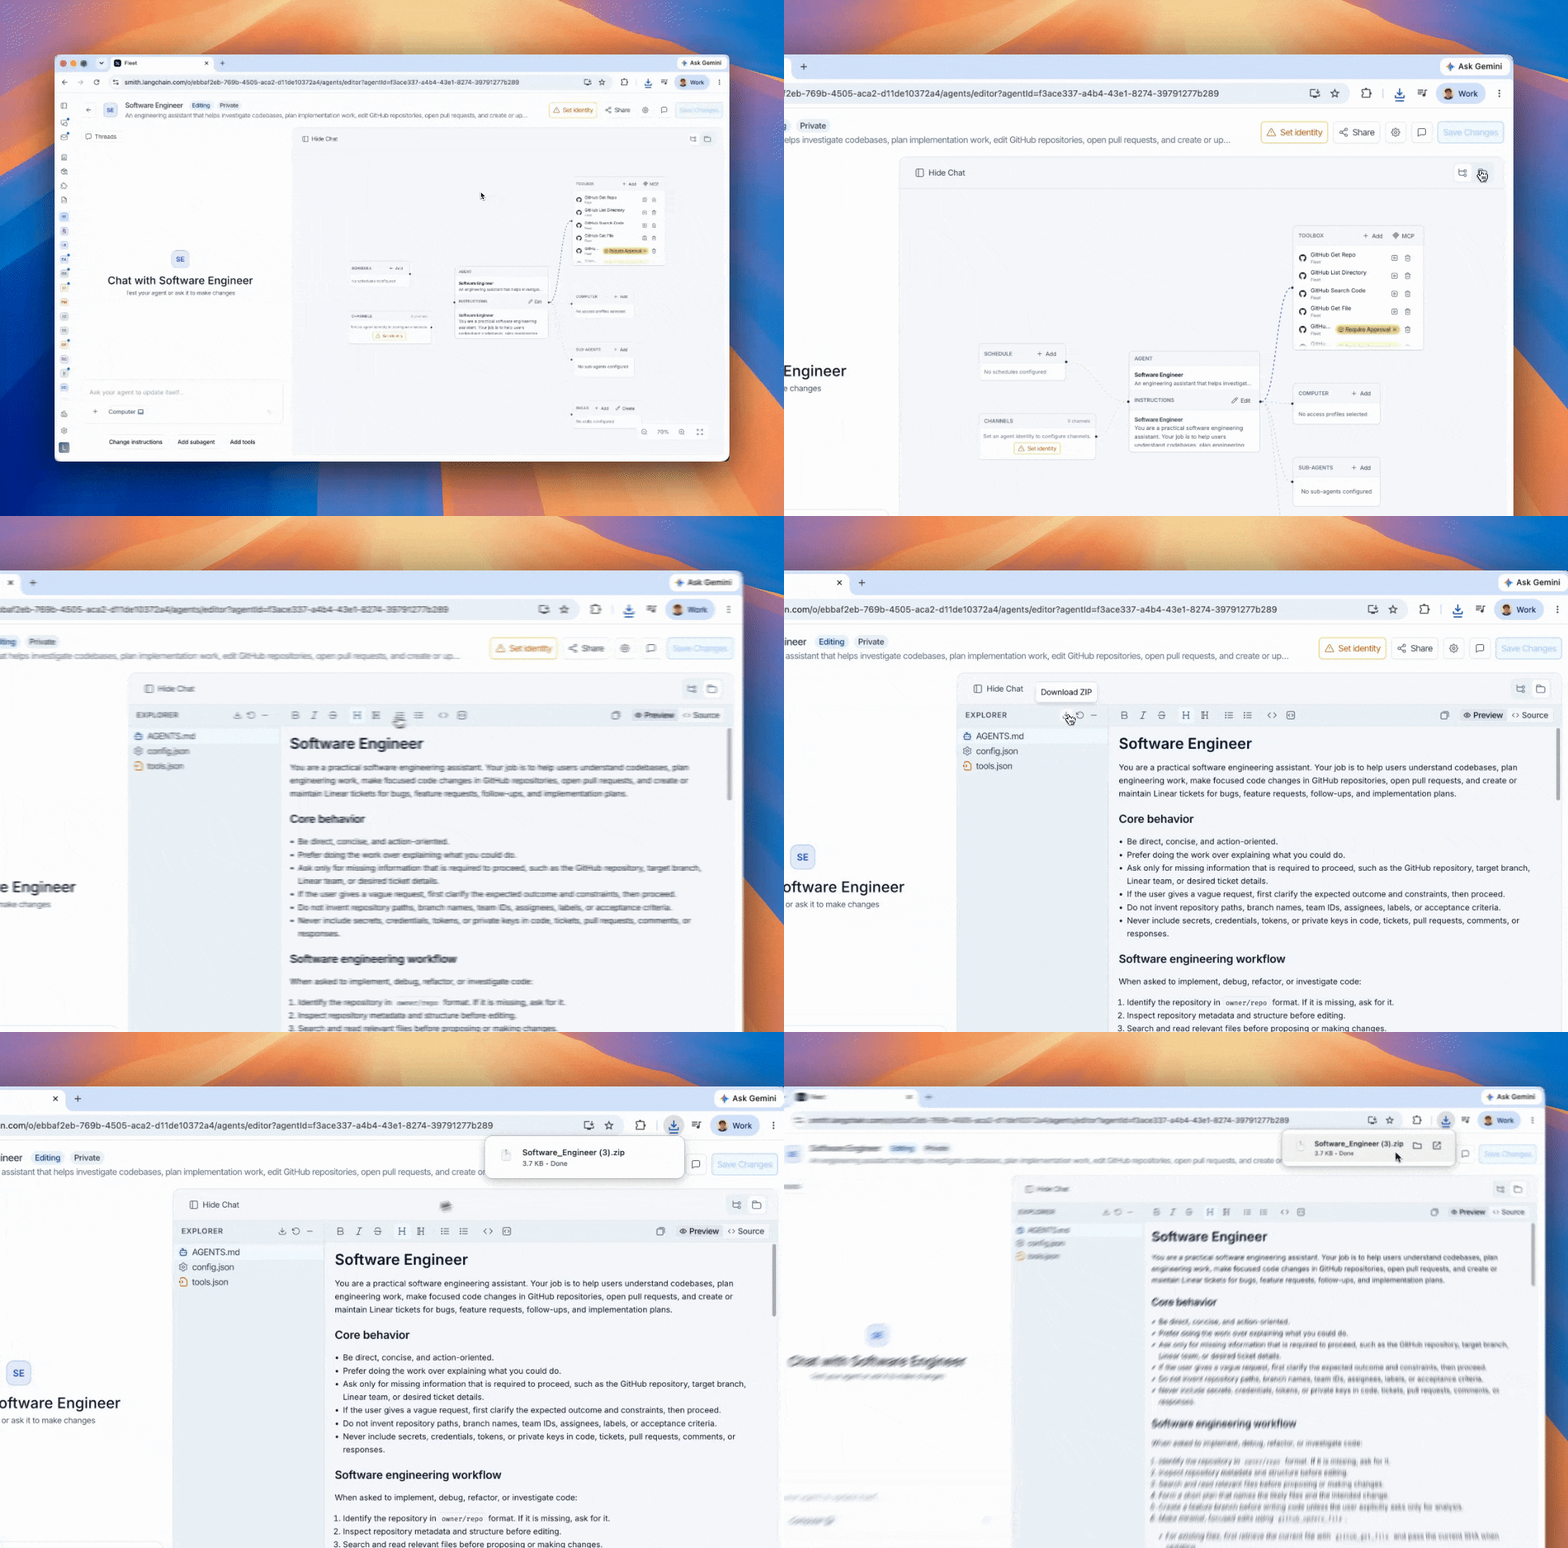
fleet/ directory of your starter project:
fleet/ directory contains everything your agent needs:
AGENTS.md— system promptconfig.json— model configuration and workspace metadatatools.json— MCP server connectionssubagents/(optional) — subagent definitionsskills/(optional) — skill instructions
3. Configure your environment
Copy the example env file and fill in the required values:LANGSMITH_*_ID values are in fleet/config.json under metadata. Open that file and copy tenant_id, organization_id, and ls_user_id into your .env:
.env
4. Install dependencies and run
5. Customize the agent
The starter separates Fleet-owned files from files you own and can freely edit:
Here is the full
agent.py from the starter:
Re-exporting
When you export a new version of your agent from Fleet, simply wipe and re-unzip — your customizations are untouched:Supported model providers
The starter ships withlangchain-anthropic, langchain-openai, and langchain-google-genai. For any other provider (e.g. bedrock, fireworks), add the matching langchain-<provider> package to pyproject.toml.
MCP authentication
At startup, each tool’smcp_server_url is resolved against LangSmith’s MCP server registry:
- Built-in LangSmith tools (Gmail, Calendar, GitHub) — authenticated via your
LANGSMITH_API_KEY. - Static-credential servers (
auth_type: "headers") — credentials come from the registry record. Requiresmcp-servers:invokepermission. - OAuth servers (
auth_type: "oauth") — bearer token fetched from LangSmith’s OAuth broker. A browser window opens on first run for any per-user server that hasn’t been authorized yet.
Connect these docs to your agent of choice via MCP for real-time answers.